A good makeup product can still look uneven if the tool is working against you. We see this most often with base makeup: the same foundation can look sheer, full-coverage, smooth, or streaky depending on whether you use a sponge, a dense brush, or the wrong brush altogether.
Makeup tools are the brushes, sponges, curlers, applicators, and grooming accessories used to apply, blend, shape, set, and correct makeup. They are different from makeup products themselves because their job is to control how those products are placed and finished on the skin.
In this guide, we’ll break down 30+ common makeup tool names and uses, including face, eye, and lip brushes, sponges, puffs, lash and brow tools, and cleaning accessories. We’ll also explain how to use each one, which tools are actually worth having, and what sellers should inspect before sourcing makeup tools in bulk.
Quick Facts
- Tools covered: 30+ across face, eyes, lips, grooming, and tool care.
- Beginner starting point: A small set of roughly 3–7 brushes, one sponge, and an eyelash curler can cover most everyday routines.
- Cleaning: Tools used with liquid or cream products generally need more frequent cleaning than powder-only brushes.
- Replacement: Sponges wear out much faster than brushes; brushes are usually replaced because of shedding, loosened ferrules, or damaged bristles rather than age alone.
- For sellers: Later in the guide, we’ll cover the common QC problems to check before ordering makeup tools in bulk.
Makeup Tools at a Glance
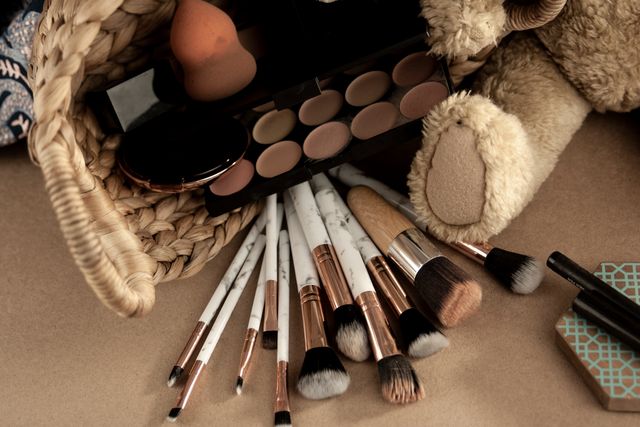
If you only want a quick reference, this table covers the main makeup tool names and uses in one place. We’ll explain each category in more detail below.
| Category | Tool | What it does | How to use it |
| Face | Foundation brush | Applies liquid or cream foundation evenly | Work from the center of the face outward using short strokes |
| Face | Stippling brush | Builds light, diffused layers of liquid or cream product | Bounce the brush onto the skin, then blend lightly in circles |
| Face | Powder brush | Applies loose or pressed powder | Tap off excess product, then sweep lightly over the face |
| Face | Kabuki brush | Buffs powder, bronzer, or mineral foundation | Use broad circular motions to build and blend coverage |
| Face | Blush brush | Places color on the cheeks | Apply to the apples or upper cheeks, then blend toward the temples |
| Face | Contour brush | Adds definition around cheekbones and the jaw | Place product in the hollows, then blend until no hard edge remains |
| Face | Fan brush | Applies a light layer of highlighter or removes fallout | Sweep gently over high points or under the eyes |
| Face | Concealer brush | Applies concealer to small areas | Pat product onto spots or under the eyes, then soften the edges |
| Eyes | Flat shader brush | Packs eyeshadow onto the eyelid | Press shadow onto the lid instead of sweeping it |
| Eyes | Blending brush | Softens eyeshadow edges | Use light back-and-forth or circular motions through the crease |
| Eyes | Crease brush | Adds depth to the eye socket | Build a deeper shade gradually through the crease |
| Eyes | Angled brush | Applies brow product or gel liner | Use short strokes for brows or small controlled strokes for liner |
| Eyes | Pencil brush | Smudges shadow or liner close to the lashes | Work in small motions along the upper or lower lash line |
| Eyes | Eyeliner brush | Applies gel or cream eyeliner | Draw short dashes along the lash line, then connect them |
| Eyes | Spoolie | Grooms brows and separates lashes | Brush brows into place or comb through clumped mascara |
| Lips | Lip brush | Applies lipstick precisely | Define the lip edge first, then fill toward the center |
| Lips | Retractable lip brush | Provides portable, precise lip application | Use like a regular lip brush, then retract or cap it after use |
| Detail | Detail brush | Handles precise corrections around eyes and lips | Use a small amount of product to sharpen or clean edges |
| Sponges & Puffs | Beauty sponge | Blends liquid and cream makeup | Dampen, squeeze out excess water, then bounce over the skin |
| Sponges & Puffs | Cushion puff | Applies cushion foundation in thin layers | Press the puff into the cushion, then pat and roll over the skin |
| Sponges & Puffs | Powder puff | Presses setting powder firmly into the skin | Use a press-and-roll motion over areas that need more setting |
| Sponges & Puffs | Silicone sponge | Applies liquid product without absorbing it | Spread or tap on small amounts, then blend carefully |
| Grooming | Eyelash curler | Lifts and curls lashes before mascara | Clamp clean, dry lashes near the root for a few seconds |
| Grooming | Heated eyelash curler | Uses gentle heat to shape lashes | Run it upward through clean lashes before mascara |
| Grooming | Mini eyelash curler | Curls hard-to-reach inner or outer lashes | Curl small sections rather than the entire lash line |
| Grooming | Tweezers | Removes stray hairs or helps place false lashes | Grip close to the root and pull in the direction of hair growth |
| Grooming | Brow scissors | Trims long eyebrow hairs | Brush brows upward and trim only the hairs extending past the shape |
| Grooming | Brow razor | Removes fine hair around the brow area | Use short, light strokes with minimal pressure |
| Grooming | False-lash applicator | Helps position strip lashes | Hold the lash band at the center and place it close to the lash line |
| Hygiene | Cotton pads | Removes makeup and helps with skin prep | Saturate with remover or toner, then press or wipe gently |
| Hygiene | Cotton swabs | Corrects small makeup mistakes | Add a little micellar water and clean around liner or lip edges |
| Hygiene | Pencil sharpener | Sharpens eye, lip, and brow pencils | Twist the pencil slowly and clean out product buildup regularly |
| Professional | Mixing palette and spatula | Keeps cream products hygienic and allows shade mixing | Decant product onto the palette instead of working from the container |
| Tool Care | Brush cleanser or soap | Removes makeup, oil, and residue from bristles | Clean the bristles while keeping excess water away from the ferrule |
| Tool Care | Silicone cleaning mat | Helps deep-clean dense brushes | Work wet, soapy bristles over the textured surface |
| Tool Care | Drying rack or brush holder | Supports hygienic drying and storage | Position cleaned brushes so moisture does not collect inside the ferrule |
The main thing to notice is that many tools overlap, but they do not all create the same finish. A dense brush generally places more product, a fluffy brush diffuses it, and a damp sponge tends to shear it out.
Face Makeup Brushes
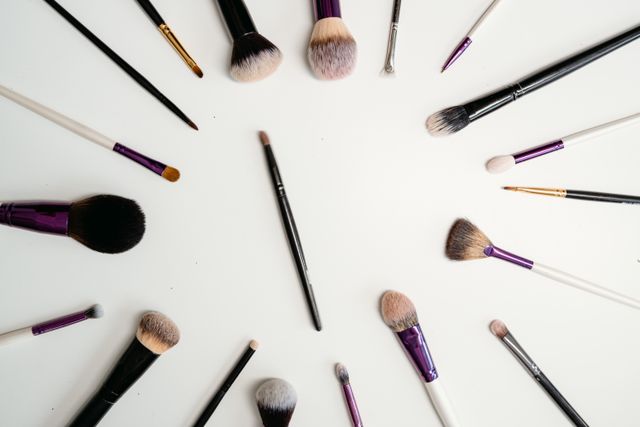
Face brushes mainly differ in size, shape, and bristle density, and those three things determine how much product they pick up and how concentrated the finish looks. In practice, we recommend choosing the brush based on the coverage you want rather than buying several brushes that do almost the same job.
| Brush | Main use | Best for | How to use it |
| Foundation brush | Applies liquid or cream foundation | Controlled, even coverage | Start at the center of the face and blend outward in short strokes |
| Stippling brush | Applies thin layers of liquid or cream products | Sheer, diffused coverage | Lightly bounce product onto the skin, then soften it with small circular motions |
| Powder brush | Applies loose or pressed powder | Light, even setting | Pick up a small amount, tap off excess, and sweep gently over the skin |
| Kabuki brush | Buffs powder, bronzer, or mineral foundation | Fuller, polished coverage | Work the product into the skin using broad circular motions |
| Blush brush | Applies blush to the cheeks | Soft, controlled color | Place color on the cheeks and blend upward toward the temples |
| Contour brush | Adds definition around the cheekbones and jaw | More precise sculpting | Place product where you want shadow, then blend until the edges disappear |
| Fan brush | Applies a light layer of highlighter or removes powder fallout | Very light application | Sweep gently across the high points of the face or under the eyes |
| Concealer brush | Applies concealer to small areas | Blemishes, under-eyes, and precise correction | Pat product onto the area, then soften the edges rather than wiping it away |
A dense brush usually deposits more product, which makes it useful for foundation, contour, or other areas where you want coverage. Fluffier brushes spread product over a wider area, so we prefer them for powder, blush, and softer finishes.
You also do not need all eight. For most everyday routines, a foundation or kabuki brush, powder brush, blush brush, and concealer brush cover the main face-makeup steps. More specialized shapes such as stippling and fan brushes are useful when you specifically want the finish they create.
Eye Makeup Brushes
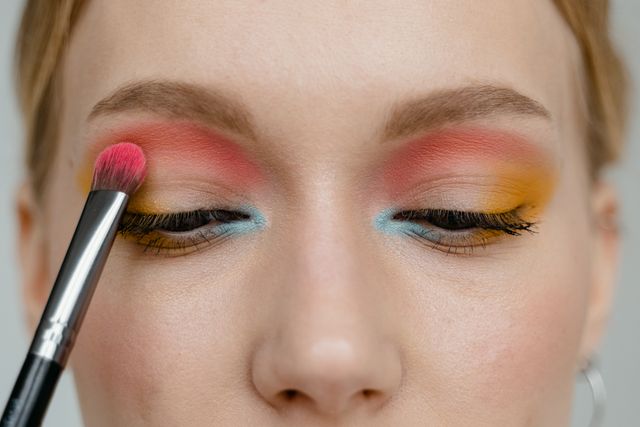
Eye brushes are smaller because placement matters more around the eyes. As a rule, smaller brushes give you more precision, while larger, fluffier brushes are better for diffusing color and softening edges.
| Brush | Main use | Best for | How to use it |
| Flat shader brush | Packs eyeshadow onto the lid | Strong color payoff | Press shadow onto the lid in thin layers rather than sweeping it |
| Blending brush | Softens edges between shades | Smooth transitions | Use light back-and-forth or circular motions through the crease |
| Crease brush | Adds depth to the eye socket | Defined crease work | Place a deeper shade in the crease and build it gradually |
| Angled brush | Applies brow products or gel liner | Brows and precise liner | Use short, controlled strokes; for brows, mimic the direction of hair growth |
| Pencil brush | Smudges shadow or liner close to the lashes | Smoky detail work | Work in small motions along the upper or lower lash line |
| Eyeliner brush | Applies gel or cream eyeliner | Thin, controlled lines | Draw short dashes along the lash line, then connect them |
| Spoolie | Grooms brows and separates lashes | Brow shaping and mascara cleanup | Brush brows into place or comb gently through clumped lashes |
Size is especially important with eye brushes. If you have smaller or hooded eyes, a narrower blending or crease brush usually gives you better control because it keeps color from spreading too high. Larger eye shapes can handle wider brushes without losing precision.
For a basic routine, we would prioritize a flat shader, blending brush, angled brush, and spoolie. Pencil and dedicated crease brushes become more useful once you start doing more detailed or multi-shade looks.
Lip and Detail Brushes
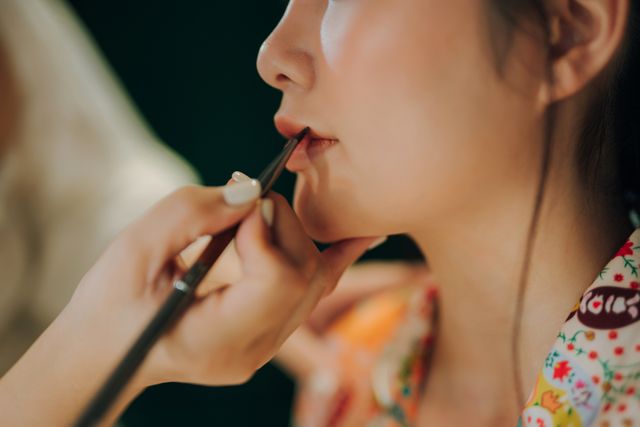
Lip and detail brushes are small and firm because precision matters more than coverage. They are especially useful when you want cleaner edges, controlled color placement, or corrections without disturbing the rest of the makeup.
| Brush | Main use | Best for | How to use it |
| Lip brush | Applies lipstick or lip color precisely | Clean edges and even coverage | Define the lip line first, then fill inward using short strokes |
| Retractable lip brush | Provides the same control in a portable format | Travel and touch-ups | Apply like a standard lip brush, then retract or cap it after use |
| Detail brush | Handles very small corrections or precise product placement | Lip edges, inner corners, and spot corrections | Pick up a small amount of product and use the tip to sharpen or clean the edge |
We find lip brushes most useful with bold or highly pigmented colors, where a slightly uneven edge is much more noticeable. A detail brush is more versatile: depending on its shape, it can clean up lipstick, place concealer around the brows, or add product to very small areas.
Other Essential Makeup Tools
Brushes handle most product placement, but a complete kit also needs tools for blending, setting, grooming, and cleanup. This is where sponges, puffs, curlers, tweezers, and hygiene accessories become useful.
Sponges and Puffs
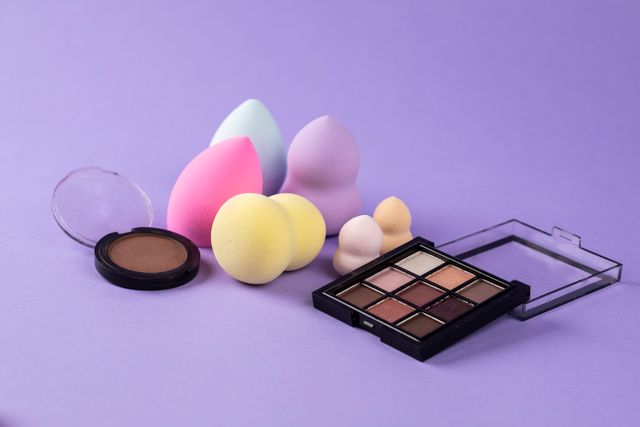
These tools all press product into the skin, but they behave differently depending on their material and surface.
- Beauty sponge: Best for blending liquid and cream foundation, concealer, blush, and contour. Dampen it, squeeze out the excess water, then bounce it over the skin rather than dragging. The rounded side covers larger areas, while the pointed tip works around the nose and under the eyes.
- Cushion puff: Designed for cushion foundation and other thin complexion formulas. Its flatter, denser surface helps apply product in light layers. Press it into the cushion, then pat or gently roll it over the skin.
- Powder puff: Used mainly to press loose or pressed powder into the skin. We find it especially useful under the eyes and through the T-zone because a press-and-roll motion sets powder more firmly than a fluffy brush.
- Silicone sponge: A non-porous applicator that absorbs virtually no product. That can reduce product waste, but it also feels firmer and does less blending for you, so you need to work in small amounts and finish the edges carefully.
Eyelash Curlers
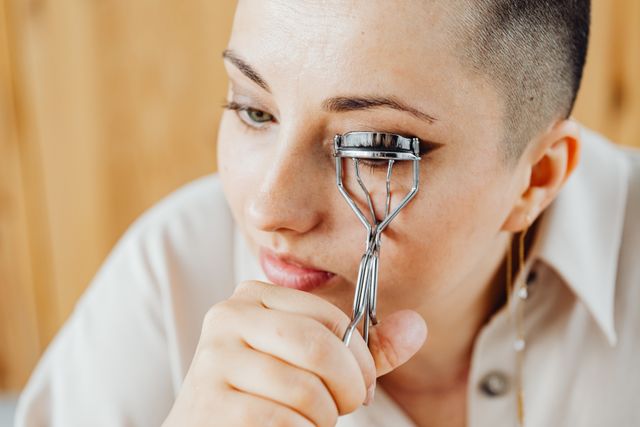
A standard eyelash curler is still the most useful option for most people. Use it on clean, dry lashes before mascara, positioning the pad near the roots and applying gentle pressure for a few seconds.
There are also more specialized versions:
- Heated eyelash curler: Uses gentle heat to shape lashes and can be useful for lashes that resist a standard curler. Follow the device instructions carefully and avoid excessive heat near the eye.
- Mini or partial curler: Has a narrower clamp, making it easier to reach the inner and outer corners without curling the whole lash line.
- Lower-lash curler: Uses a smaller shape designed for the shorter lower lashes. This is a niche tool rather than something most everyday users need.
We would start with a regular curler before adding specialty versions. They solve specific problems rather than replacing the standard design.
Brow and Precision Tools
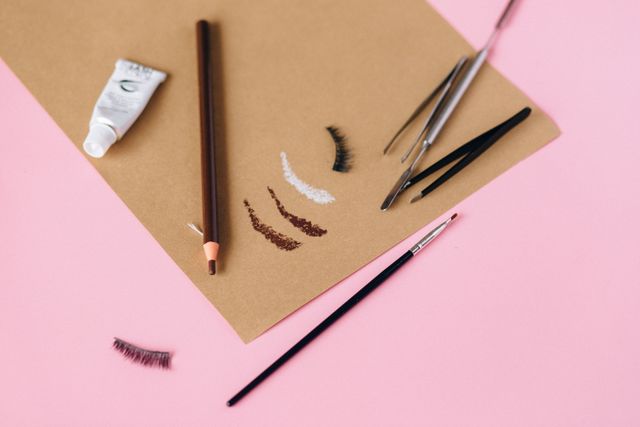
A few small grooming tools can make as much difference as an extra brush:
- Tweezers: Remove stray brow hairs and can also help position false lashes. For brow grooming, pull in the direction of hair growth rather than straight outward.
- Brow scissors: Trim hairs that extend beyond the brow shape. Brush the hairs upward first and cut only the excess length.
- Brow razor: Removes fine hair around the brows and face. Use light, controlled strokes and avoid repeatedly passing over the same area.
- Spoolie: Brushes brow hairs into place and blends pencil or pomade so the result looks softer.
- False-lash applicator: Holds a strip lash more evenly than fingers or standard tweezers. Grip the center of the band, position the middle first, and then adjust the corners.
Cotton and Correction Tools
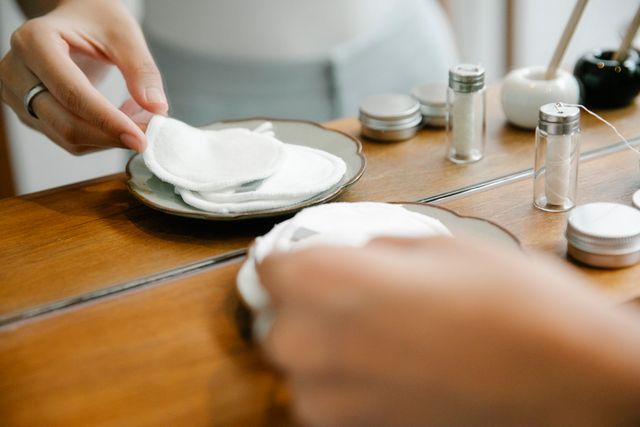
Some of the most useful makeup tools are also the simplest.
- Cotton pads: Useful for makeup removal, skin prep, and wiping away larger mistakes.
- Cotton swabs: Better for precise corrections. A small amount of micellar water on the tip can clean up eyeliner, mascara, or lipstick without removing the surrounding makeup.
- Pencil sharpener: Keeps eye, lip, and brow pencils precise. Clean out product residue regularly so softer pencils do not clog the blade.
Mixing Palette and Spatula
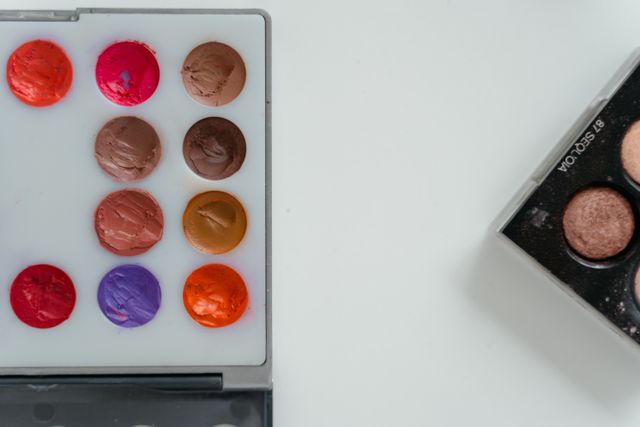
A mixing palette and spatula are mainly hygiene and customization tools. They allow you to scoop out foundation, concealer, lipstick, or cream products and mix shades without repeatedly dipping a brush or finger into the original container.
For personal use, they are optional. For professional makeup artists or anyone working on multiple people, they become much more valuable because they help keep the original product cleaner.
How to Choose the Right Makeup Tools for Yourself
You do not need every brush, sponge, or applicator available. We usually suggest choosing tools in this order: the products you use, the finish you want, your skill level, and then build quality.
1. Match Tools to the Products You Use
Start with your actual routine. Buying specialist tools for products you rarely use usually just creates clutter.
| If you use… | Choose these tools |
| Liquid foundation | Foundation brush, buffing brush, or damp beauty sponge |
| Powder foundation | Kabuki brush or powder brush |
| Cream blush or contour | Dense synthetic brush or beauty sponge |
| Powder blush or bronzer | Fluffy blush brush or angled contour brush |
| Eyeshadow | Flat shader, blending brush, and crease brush |
| Gel liner or brow pomade | Angled brush or fine eyeliner brush |
| Lipstick or lip tint | Lip brush, plus cotton swabs for cleanup |
A tool should solve a real application problem. If your routine is mostly tinted moisturizer, blush, mascara, and brows, you do not need a 20-piece brush set.
2. Choose Based on the Finish You Want
The same product can look noticeably different depending on the tool.
- A damp sponge sheers out liquid and cream products for a lighter, more skin-like finish.
- A dense brush keeps more product on the skin, which generally gives stronger coverage.
- A fluffy brush diffuses powders over a wider area and is harder to overload.
- A flat or firm brush places the product more precisely and with greater intensity.
This is why we would choose the finish first rather than assuming one tool is simply “better” than another.
3. Match the Tool to Your Skill Level
Beginners usually do better with tools that are forgiving and easy to control. A sponge, powder brush, blush brush, blending brush, angled brush, and spoolie can handle a surprising amount.
Specialist tools make more sense once you know why you need them. A pencil brush helps with detailed smoky eyes, for example, but it adds little value if you rarely wear eyeshadow.
4. Check the Material and Build Quality
For brushes, we look at both the bristles and the construction.
Synthetic bristles work especially well with liquid and cream products because they absorb less product and are easier to wash. Natural hair has traditionally been associated with powder application, although modern synthetic fibers can now perform very well with powders too.
Then check the physical build:
- Bristles should feel soft rather than scratchy.
- Gently tugging the bristles should not produce obvious shedding.
- The ferrule should feel firmly attached to the handle.
- Brush heads should not rotate or wobble.
- Sponges should rebound after squeezing rather than staying compressed.
- Metal tools such as tweezers should meet evenly at the tips.
For sellers, these same details become basic sample-QC checks before placing a larger order.
5. Choose Quality Over Quantity
A smaller set with clearly different shapes is usually more useful than a large set filled with near-duplicates. For most people, 6–8 well-chosen tools can cover far more real routines than a 20-piece set of repetitive brushes.
What Makeup Tools Can Beginners Skip?
A few tools are useful, but rarely essential at the start:
- Fan brush: A small fluffy brush can usually apply highlighter just as well.
- Silicone sponge: Its zero-absorption design is interesting, but a standard damp sponge is generally easier to learn with.
- Heated eyelash curler: Useful for stubborn lashes, but start with a standard curler first.
- Lower-lash curler: Very specialized and unnecessary for most routines.
- Mixing palette and spatula: Valuable for professional hygiene, but usually excessive for personal daily makeup.
- Oversized brush sets: Avoid buying extra shapes simply because they come bundled together.
Our rule is simple: add a tool when your current one cannot give you the placement, finish, or precision you need. That keeps the kit practical instead of turning it into a collection of rarely used accessories.
Cleaning and Maintenance of Makeup Tools
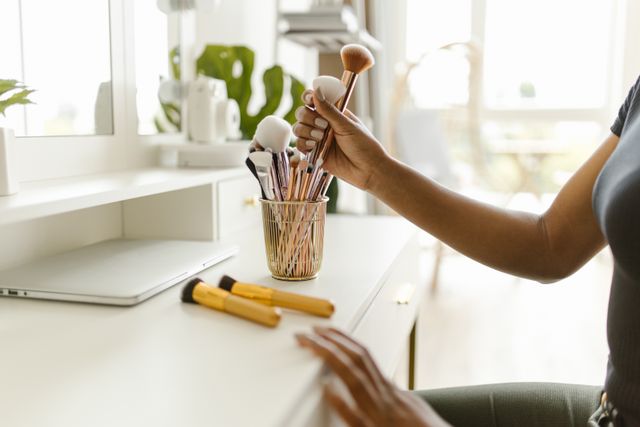
Cleaning frequency should depend on what the tool touches and what type of product it holds. Tools used with liquid and cream formulas collect residue faster, while powder-only brushes can usually go longer between washes.
How Often Should You Clean Makeup Tools?
| Tool | Cleaning frequency | Why |
| Foundation and concealer brushes | 1–2 times per week | Liquid and cream residue builds up quickly and can stiffen the bristles |
| Eye brushes | About once a week | Helps prevent old pigment from muddying new shades |
| Powder, blush, and bronzer brushes | Every 1–2 weeks | Powder accumulates more slowly but eventually affects blending |
| Beauty sponges | Every 1–3 uses | They absorb both product and moisture, so buildup happens quickly |
| Powder puffs | About once a week | Oil and powder collect directly on the surface |
| Eyelash curlers | Wipe after each use | Mascara or eyeliner residue can build up around the pad |
| Tweezers, scissors, and spatulas | Clean after each use | These tools come into direct contact with skin, hair, or product |
We treat these as practical guidelines rather than rigid rules. If a brush starts feeling stiff, changes the color of your makeup, or stops blending properly, clean it sooner.
How to Clean Makeup Brushes
For most brushes, the goal is to clean the bristles thoroughly without soaking the ferrule, where the bristles connect to the handle.
- Wet the bristles with lukewarm water.
- Add a small amount of mild soap or brush cleanser.
- Massage the bristles gently in your palm or over a silicone cleaning mat.
- Rinse until the water runs clear.
- Squeeze out excess moisture without twisting the bristles.
- Reshape the brush head and leave it to dry flat or with the bristles angled downward.
We avoid submerging the entire brush because repeated water exposure around the ferrule can weaken the construction over time. Standing a wet brush upright can also allow water to travel toward that area.
How to Clean Makeup Sponges and Puffs
Beauty sponges need more frequent washing because the product gets pushed into the foam rather than staying only on the surface.
Wet the sponge fully, work in a mild cleanser, then squeeze and rinse repeatedly until most of the product is gone. Press out the water with a clean towel and let it air-dry somewhere well ventilated.
Powder puffs can usually be washed in much the same way, although the exact care instructions depend on the material. Avoid putting either back into a closed makeup bag while still damp.
How to Clean Metal Makeup Tools
For tweezers, brow scissors, lash applicators, curlers, and spatulas, wipe away visible product after use and clean the contact surfaces regularly.
With eyelash curlers, pay particular attention to the pad and the upper clamp where mascara residue tends to collect. For tweezers, also check whether the two tips still meet evenly; once they lose alignment, their grip becomes noticeably worse.
Makeup Brush Cleaning Tools
Cleaning accessories are useful products in their own right, especially if you own a larger brush collection.
- Brush cleanser or brush soap: Helps break down foundation, concealer, pigment, and oils in the bristles.
- Silicone cleaning mat: Adds texture that helps work product out of dense brush heads more efficiently than fingers alone.
- Drying rack or brush holder: Keeps brushes organized while drying and can help prevent moisture from collecting around the ferrule.
- Disposable mascara wands: Useful whenever mascara is being applied to more than one person.
- Disposable lip applicators: Reduce the need to dip a used applicator back into shared lip products.
For personal use, cleanser and a drying surface are usually enough. The disposable and separation systems become much more important in professional or shared-use settings.
When Should You Replace Makeup Tools?
We recommend replacing tools based on condition and performance, not just age.
Replace a tool when you notice signs such as:
- Brushes: persistent shedding, scratchy bristles, a loose ferrule, or a brush head that no longer returns to shape after washing.
- Sponges: tearing, crumbling, permanent odor, major discoloration, or loss of elasticity.
- Eyelash curlers: cracked, hardened, or deeply worn pads.
- Tweezers: tips that no longer meet evenly or cannot grip fine hairs.
- Puffs: damaged fabric, loss of shape, or residue that no longer washes out properly.
Sponges generally need replacing much sooner than brushes. A well-made brush can remain usable for years if it is cleaned and stored properly, while a sponge is a consumable tool that deteriorates much faster with regular use.
Essential Makeup Tools Checklist for Beginners
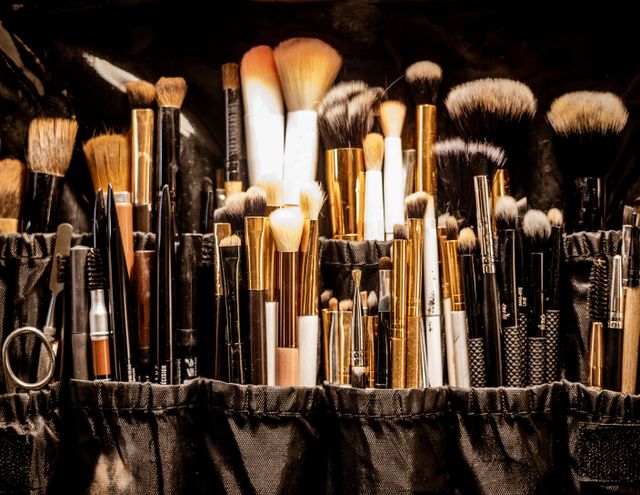
You do not need a large kit to get started. These 12 tools cover the main steps in a basic makeup routine:
- Makeup sponge or beauty blender: blends foundation, concealer, and cream products.
- Foundation or buffing brush: gives smoother base application and fuller coverage.
- Powder brush: applies loose or pressed setting powder.
- Blush brush: works for blush, bronzer, and soft contour.
- Eyeshadow blending brush: softens harsh edges between shades.
- Flat eyeshadow brush: packs color onto the eyelid.
- Angled brow or liner brush: applies brow product, eyeliner, or other precise details.
- Spoolie brush: grooms brows and separates clumped lashes.
- Eyelash curler: lifts lashes before mascara.
- Tweezers: handles basic brow grooming and can help position false lashes.
- Cotton pads and swabs: useful for makeup removal, skin prep, and small corrections.
- Pencil sharpener: keeps lip liners, eyeliners, and brow pencils precise.
For most beginners, this is enough. Add specialist tools only when your routine actually calls for them.
A Professional Makeup Artist’s Toolbox Revealed
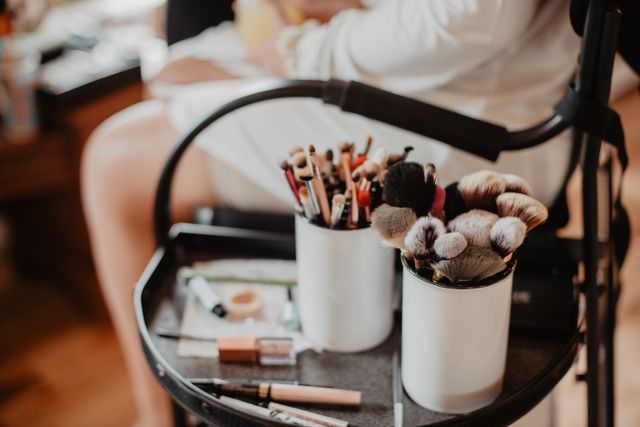
A professional makeup kit is different from a personal kit because it has to work across multiple faces while keeping products and tools sanitary. The biggest upgrade is usually the hygiene system, not simply owning more brushes.
Application Tools
Most professional kits include:
- Multiple face brushes in different sizes for foundation, powder, blush, contour, and concealer.
- Several eye brushes for packing, blending, crease work, liner, and detail.
- Lip and detail brushes for precise application and corrections.
- Beauty sponges and powder puffs, with enough clean backups for multiple clients.
- A mixing palette and spatula for decanting and mixing cream or liquid products.
Lash and Brow Tools
Professionals also keep dedicated grooming tools on hand:
- Eyelash curlers
- Tweezers
- Brow scissors
- Spoolies
- False-lash applicators
- Disposable mascara wands
These tools are small, but they need to be cleaned or replaced between clients just as carefully as brushes.
Professional Hygiene Setup
This is where a pro kit becomes meaningfully different from a personal one.
- Separate clean and used brush containers: Once a brush touches a client, it should not go back into the clean section.
- Disposable mascara wands and lip applicators: Use a fresh one for each client and discard it after use.
- Mixing palette and spatula: Scoop product out rather than repeatedly dipping a used brush into the original container.
- Sanitation supplies: Keep appropriate tool-cleaning and surface-sanitizing products in the kit for between-client cleanup.
- Disposable sponge wedges and cotton supplies: Useful for single-client application, corrections, and prep.
- Organized storage: Clean tools, used tools, disposables, and products should stay physically separated during both use and transport.
For professionals, this hygiene discipline matters as much as application skill. A large brush collection means very little if clean and contaminated tools are being mixed together.
Sourcing Makeup Tools: What Sellers Should Check
Makeup tools tend to fail in predictable ways: brushes shed, ferrules loosen, sponges tear, curlers lose pad tension, and tweezers stop meeting cleanly at the tips. If you are sourcing for your own brand, these are the issues worth testing before you move from samples to a bulk order.
Sample Tests to Run Before Ordering
- Bristle shedding: Gently pull through the bristles, then wash the sample repeatedly. A few loose fibers can happen initially, but continued shedding points to weak construction.
- Ferrule stability: Twist the brush head lightly. It should not wobble or rotate independently from the handle.
- Bristle feel: Run the brush across the back of your hand. Scratchy or uneven tips are a common quality complaint and should be caught at the sample stage.
- Sponge resilience: Compress the sponge repeatedly and check how quickly it returns to shape. Look for tearing, crumbling, permanent dents, or slow rebound.
- Eyelash curler pads: Check that the pad feels even and resilient rather than hard or brittle. It is also worth confirming whether replacement pads are available.
- Tweezer alignment: Close the tweezers and inspect the tips. They should meet evenly along the gripping edge.
- Material claims: If you plan to market a sponge as latex-free or a brush set as synthetic, ask for those specifications in writing rather than relying on a marketplace listing.
These checks catch many common defects, but they do not replace proper sampling and pre-shipment inspection.
Build Bundles Around Real Use Cases
Bundles are easier to sell when the items work together instead of simply increasing the piece count. Practical combinations include:
- Beginner brush sets with distinct face and eye brush shapes
- Sponge multi-packs because sponges are replaced more frequently than brushes
- Brow grooming kits with tweezers, scissors, spoolies, and razors
- Brush-cleaning kits with cleanser, a silicone mat, and a drying accessory
- Travel sets with fewer, multi-purpose tools and compact packaging
For private-label products, packaging and presentation also affect how the set is positioned. NicheSources can support private labeling and branding and custom packaging, while our guide to makeup packaging types covers common packaging formats in more detail.
Do Not Skip Pre-Shipment Inspection
A supplier-approved sample only tells you what one unit looked like. Production quality can still vary across a larger batch, so inspection should check the same failure points again before shipment: shedding, ferrule fit, sponge consistency, tweezer alignment, finish, packaging, and any agreed material specifications.
If you are evaluating makeup tools for your own line, NicheSources can help with sourcing, supplier coordination, quality inspection, branding, and packaging. You can request a free sourcing quote to evaluate fit before placing an order.
FAQs about Makeup Types and Their Uses
What Are the Different Makeup Categories?
As a general rule, we can differentiate between these basic makeup categories:
-Base or primer makeup (face primer, eyeshadow primer, etc.)
-Foundation products (foundation, blush, contour, highlighter, etc.)
-Eye makeup (eyeliner, mascara, eyeshadow, etc.)
-Lip makeup (lip liner, lipstick, lip balm, etc.)
-Setting makeup (setting spray, setting powder, etc.)
What to Consider When Choosing between Different Makeup Types?
Here are some important considerations when choosing the type of makeup you want to sell:
–Makeup category: do you want to sell foundation products, eyeshadow palettes, anti-aging primers, or perhaps launch a lipstick brand;
–Target group: who is your ideal buyer and what’s the audience you’re targeting;
–Price and profit: wholesale price vs. projected sale price (to calculate your profit margins);
–Quality: what’s the price point vs. quality you’re offering to your buyers;
–MOQ: what’s your desired MOQ and can you find a supplier to match it;
–Branding or development: can your supplier help you develop a brand-new product or launch a private label brand;
–Supplier availability: can you find a trustworthy and reliable supplier (and backup suppliers) to support your business as you scale;
Is Selling Makeup Items a Good Business Idea?
Makeup is a very broad category as it is. That’s why it’s important to choose a sub-niche with less competition. The best way to stick out as a seller in a saturated market is by offering something new and original.
So, in terms of business success selling makeup items, private-label brands and niche products usually enjoy more success than generic stores that sell all types of makeup.
How Can I Source Different Makeup Types for My Business?
Here are some ways to source makeup items and products as a business:
-Check Google to find suppliers for the type of makeup needed;
-Check B2B marketplaces like Alibaba (or AliExpress if you’re looking for smaller quantities);
-Check supplier directories;
Visit trade shows in China;
-Partner with a local sourcing agent like NicheSources and enjoy an all-around service;
Read More: 11 Types of Makeup Packaging : A Complete Guide for Your Brand
We would avoid sharing makeup brushes unless they are properly cleaned and sanitized between users. Shared tools can transfer oils, product residue, and microorganisms from one person’s skin to another. Professional artists manage this by separating used tools, cleaning them between clients, and relying on disposable applicators where appropriate.
Are Expensive Makeup Brushes Always Better?
No. Price alone does not guarantee better performance. We would pay more attention to bristle softness, shedding, ferrule stability, handle construction, and whether the brush shape suits its intended use. A smaller, well-built set can outperform a much larger premium-priced kit filled with redundant shapes.
Why Does My Foundation Look Streaky With a Brush?
Streaking can happen when the brush holds dried product, the foundation is applied too heavily, or a flat brush is used without enough blending. Start with a thin layer and build gradually. Cleaning the brush may also solve the problem if the old foundation has stiffened the bristles.
What Makeup Tools Are Best for Travel?
Prioritize compact, multi-purpose tools. A travel kit might include a makeup sponge, medium face brush, blush brush, blending brush, angled brush, spoolie, eyelash curler, tweezers, and a small sharpener. Retractable brushes and protected brush cases are especially useful because they keep exposed bristles away from the rest of your bag.
How Can You Tell What a Makeup Brush Is For?
Look at its size, density, and shape. Dense flat brushes generally deposit more product, fluffy brushes diffuse it, angled brushes follow contours or create precise lines, and very small brushes handle detail work. Brush names are helpful, but the shape often tells you more about what the tool can actually do.
Do Makeup Tools Need to Match a Specific Brand of Makeup?
No. Makeup brushes, sponges, curlers, and most other tools are not brand specific. Choose them according to the formula, application area, and finish you want rather than the logo on the product. The main exception is certain refillable or proprietary systems, where an applicator may be designed specifically for its packaging.